> For the complete documentation index, see [llms.txt](https://docs.besmart.software/llms.txt). Markdown versions of documentation pages are available by appending `.md` to page URLs; this page is available as [Markdown](https://docs.besmart.software/2d-drafting-and-documentation/smart-documentation/quick-dimensions/dimension-chains-between-2-points.md).
# Dimension Chains Between 2 Points
### Element Dimensioning Configuration

Before you start working with the Quick Dimensions tool, you should set up a configuration. Your changes can be saved to current configurations, saved as a set of new configurations, renamed or deleted.
**1 - Show Categories** – select the categories that will show certain Category Names.
**2 - Category Name** – the list of categories that can be selected for dimensioning configuration.
**3 - Auto Dimension** – the checkbox indicates what categories will be included in the dimension chain when creating dimensions.
| 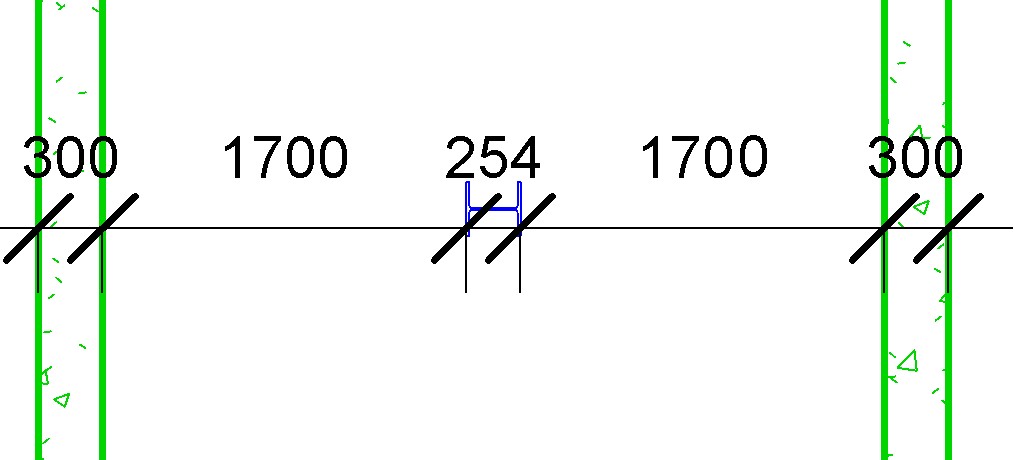 | **On Outer Faces** – dimensions will be placed on the outer faces of the element. |
| ------------------------------------------------------------------------------------------------------------------------------------------------------------------------------------------------------ | --------------------------------------------------------------------------------- |
|
| **On Outer Faces** – dimensions will be placed on the outer faces of the element. |
| ------------------------------------------------------------------------------------------------------------------------------------------------------------------------------------------------------ | --------------------------------------------------------------------------------- |
| 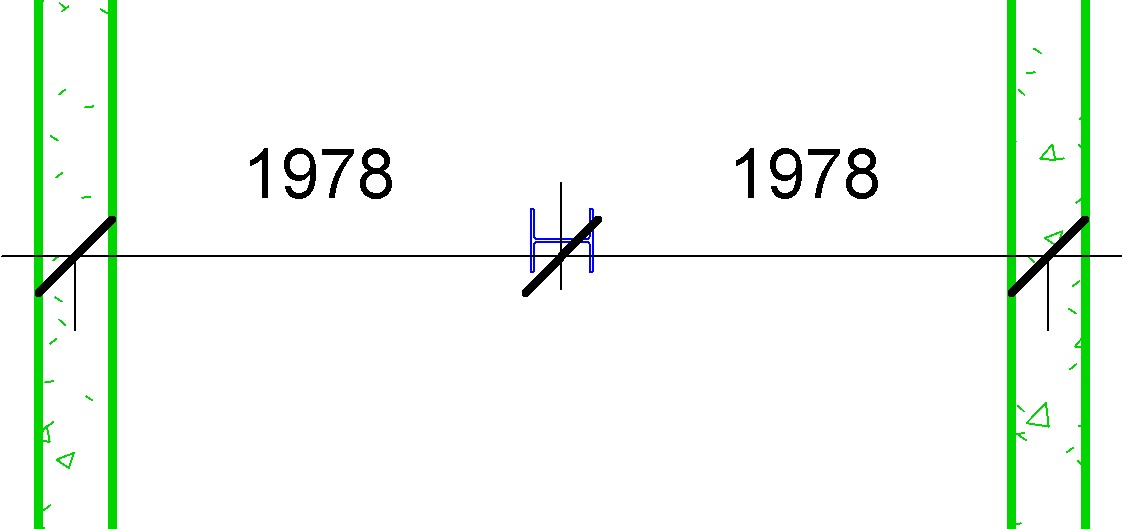 | **Center Line** – dimensions will be placed on the center line of the element. |
**Find all Elements in Level by Location Line (for Section Views)** – if this checkbox is ticked, then all element instances that are created in the respective level will be included in dimensioning. If the checkbox is unticked, then only the elements crossed by the user-defined line will be included in the dimension. This function is created only for section views.

### Insert Dimensions
**Insert Dimensions** – inserts dimensions according to the configuration defined in the Element Dimensioning Configuration.
This function can be selected from the configuration dialog as well.

Firstly, the dimension location point should be selected. This point also shows the beginning of the dimension chain. This can be any point in the project.
To finish a dimension chain, an element needs to be selected.

### Dimension Levels
This feature creates one dimension chain between all levels. By selecting this command, your first click indicates the location point of a dimension. Then you have to click on any level line and the dimension chain will appear.

---
# Agent Instructions
This documentation is published with GitBook. GitBook is the documentation platform designed so that both humans and AI agents can read, navigate, and reason over technical content effectively. Learn more at gitbook.com.
## Querying This Documentation
If you need additional information that is not directly available in this page, you can query the documentation dynamically by asking a question.
Perform an HTTP GET request on the current page URL with the `ask` query parameter, and the optional `goal` query parameter:
```
GET https://docs.besmart.software/2d-drafting-and-documentation/smart-documentation/quick-dimensions/dimension-chains-between-2-points.md?ask=&goal=
```
`ask` is the immediate question: it should be specific, self-contained, and written in natural language.
`goal` is optional and describes the broader end goal you are ultimately trying to accomplish on behalf of the user. GitBook uses it to tailor the answer towards what is most useful for that goal.
The response will contain a direct answer to the question and relevant excerpts and sources from the documentation.
Use this mechanism when the answer is not explicitly present in the current page, you need clarification or additional context, or you want to retrieve related documentation sections.
| **Center Line** – dimensions will be placed on the center line of the element. |
**Find all Elements in Level by Location Line (for Section Views)** – if this checkbox is ticked, then all element instances that are created in the respective level will be included in dimensioning. If the checkbox is unticked, then only the elements crossed by the user-defined line will be included in the dimension. This function is created only for section views.

### Insert Dimensions
**Insert Dimensions** – inserts dimensions according to the configuration defined in the Element Dimensioning Configuration.
This function can be selected from the configuration dialog as well.

Firstly, the dimension location point should be selected. This point also shows the beginning of the dimension chain. This can be any point in the project.
To finish a dimension chain, an element needs to be selected.

### Dimension Levels
This feature creates one dimension chain between all levels. By selecting this command, your first click indicates the location point of a dimension. Then you have to click on any level line and the dimension chain will appear.

---
# Agent Instructions
This documentation is published with GitBook. GitBook is the documentation platform designed so that both humans and AI agents can read, navigate, and reason over technical content effectively. Learn more at gitbook.com.
## Querying This Documentation
If you need additional information that is not directly available in this page, you can query the documentation dynamically by asking a question.
Perform an HTTP GET request on the current page URL with the `ask` query parameter, and the optional `goal` query parameter:
```
GET https://docs.besmart.software/2d-drafting-and-documentation/smart-documentation/quick-dimensions/dimension-chains-between-2-points.md?ask=&goal=
```
`ask` is the immediate question: it should be specific, self-contained, and written in natural language.
`goal` is optional and describes the broader end goal you are ultimately trying to accomplish on behalf of the user. GitBook uses it to tailor the answer towards what is most useful for that goal.
The response will contain a direct answer to the question and relevant excerpts and sources from the documentation.
Use this mechanism when the answer is not explicitly present in the current page, you need clarification or additional context, or you want to retrieve related documentation sections.