> For the complete documentation index, see [llms.txt](https://docs.besmart.software/llms.txt). Markdown versions of documentation pages are available by appending `.md` to page URLs; this page is available as [Markdown](https://docs.besmart.software/3d-modeling-and-design/wood-framing/common/wood-metal-framing/sheating-and-paneling-layouts/sheathing-configuration-sheathing-layout.md).
# Sheathing Configuration – Sheathing Layout
**Sheathing Layout** – predefine settings for Inner/Top and Outer/Bottom sheathing layers.
Up to two sheathing layers can be created from each side. That’s why there are separate settings for the first and second layer.
**First** and **Second** sheathing layers can be predefined in the **Link Wall**, **Link Floor** or **Link Roof** using **Sheathing** and **Sheathing II** from **Framing Layer** column.

### Parallel or Perpendicular to Stud/Joist

**Parallel** or **Perpendicular to Stud/Joist** – select if the sheathing should be parallel or perpendicular to the joist.

### Build in Place

**Build in Place** – writes Yes/No information into the sheathing instance parameter if it is build-in-place or is prefabricated with the whole wall/floor/roof frame. This parameter can later be used in schedules or view filters.
*Example with wall:*

*Example with floor/roof:*

*Example with metal roof:*

### Bottom/Base Extension and Top/End Extension

**Bottom/Base Extension, Top/End Extension** – adds an offset from the wall/floor/roof base or end.
*Example with metal wall:*

*Example with wood floor/roof:*
### Sloped Top/End Extension and Sloped Bottom/Base Extension

**Sloped Top/End Extension** and **Sloped** **Bottom/Base Extension** – adds an offset from the sloped wall/roof/roof base or end.

### Placement Direction

**Placement Direction** – predefines sheathing direction: **From Start**, **From End** or **From Both Sides**.
*Example with wall:*

*Example with floor/roof:*

### Second Row Overlap Distance

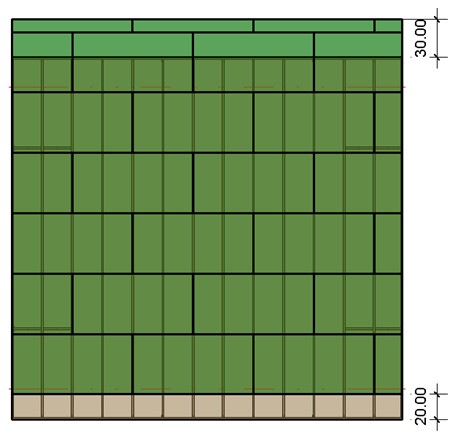
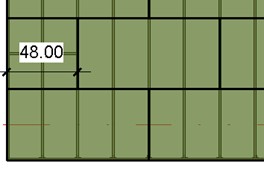
**Second Row Overlap Distance** – defines overlap distance between sheathing layouts if **Perpendicular to Stud/Joist** checkbox is ticked.
*Example with wall:*

*Example with floor/roof:*
### Align with Studs/Joists

**Align with Studs/Joists** – aligns sheathing with studs or joists.
*Example with wood frame:*

*Example with metal frame:*

*Example - ceiling gypsum elements can be divided into Parts and aligned with ceiling frames:*
### Allow to Split on Second King/Joist
**Allow to Split on Second King/Joist** – splits the sheathing on the second king or joist of the opening.
*Example with wood frame:*
*Example with metal frame:*
*Example with metal floor frame:*
### Always Try to Merge Parts
**Always Try to Merge Parts** – tries to merge parts if two parts share the same edge. Merged part size will not exceed the sheathing size that is predefined under **Sheathing Dimensions**.
### Including Part with Different Edges
**Including Part with Different Edges** – tries to merge parts with different edges of two parts. Merged part size will not exceed the sheathing size that is predefined under **Sheathing Dimensions**.
***Including Part with Different Edges** is switched ON:*
***Including Part with Different Edges** is switched OFF:*
### Vertical Split on Opening Side
**Vertical Split on Opening Side** – splits sheathing on the opening side, the nearest stud/joist, or the nearest king if top and bottom trimmers are predefined in the **Opening Framing**.
*Example with wood wall frame:*
*You can predefine top and bottom trimmers under **Wall+** → **Configs** → **Framing Configuration** → **Opening Framing**:*
*Example with metal wall frame:*
*You can predefine top and bottom trimmers under **Wall+M** → **Configs** → **Framing Configuration** → **Opening Framing**:*
*Example with metal floor:*
*You can predefine top and bottom trimmers under **Floor+M** → **Configs** → **Framing Configuration** → **Opening Framing**:*
### Minimal Width of Opening for Split
**Minimal Width of Opening for Split** – define the minimum width of opening for which splits would be available.
*Example: If the window, door, or other opening width is less than the predefined value, then there will be no splits around the opening:*
*If the window, door, or other opening width is more than the predefined value, then there will be splits around the opening:*
### Horizontal Split on Opening Side
**Horizontal Split on Opening Side** – defines if the sheathing must be split horizontally around the opening.
*Example: **Horizontal Split on Opening Side** is ticked OFF:*
*Example: **Horizontal Split on Opening Side** is ticked ON:*
### Split by Steeped Top/Bottom Ridge
**Split by Steeped Top/Bottom Ridge** – splits sheathing by steeped top or bottom ridges.
---
# Agent Instructions
This documentation is published with GitBook. GitBook is the documentation platform designed so that both humans and AI agents can read, navigate, and reason over technical content effectively. Learn more at gitbook.com.
## Querying This Documentation
If you need additional information that is not directly available in this page, you can query the documentation by asking a question.
Perform an HTTP GET request on the following URL with the `ask` and `goal` query parameters:
```
GET https://docs.besmart.software/3d-modeling-and-design/wood-framing/common/wood-metal-framing/sheating-and-paneling-layouts/sheathing-configuration-sheathing-layout.md?ask=&goal=
```
`ask` is the immediate question: it should be specific, self-contained, and written in natural language.
`goal` is what the user is ultimately trying to achieve, the reason they need the answer. Sharing it helps GitBook give you a better, more relevant answer. A goal is most helpful when it describes the outcome the user wants rather than restating the question. For example, with `ask=how do I create an API token`, a goal like `automate deployments from our CI pipeline` lets GitBook tailor the answer to that use case.
The response will contain a direct answer to the question and relevant excerpts and sources from the documentation.
Use this mechanism when the answer is not explicitly present in the current page, you need clarification or additional context, or you want to retrieve related documentation sections.