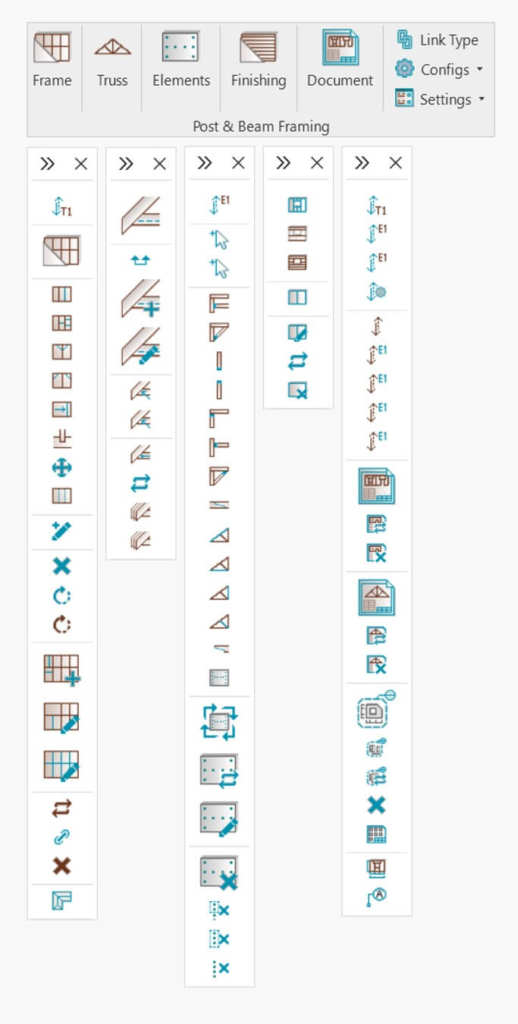
| Frame | For modeling heavy timber structures |
| Truss | For creating trusses |
| Elements | For creating connections common in heavy timber design |
| Finishing | For creating additional finishing layers (Secondary Frames, Nailers, etc.) |
| Document | For numbering elements and creating shop drawings |
| Link Type | For creating links for walls, floors and roofs |
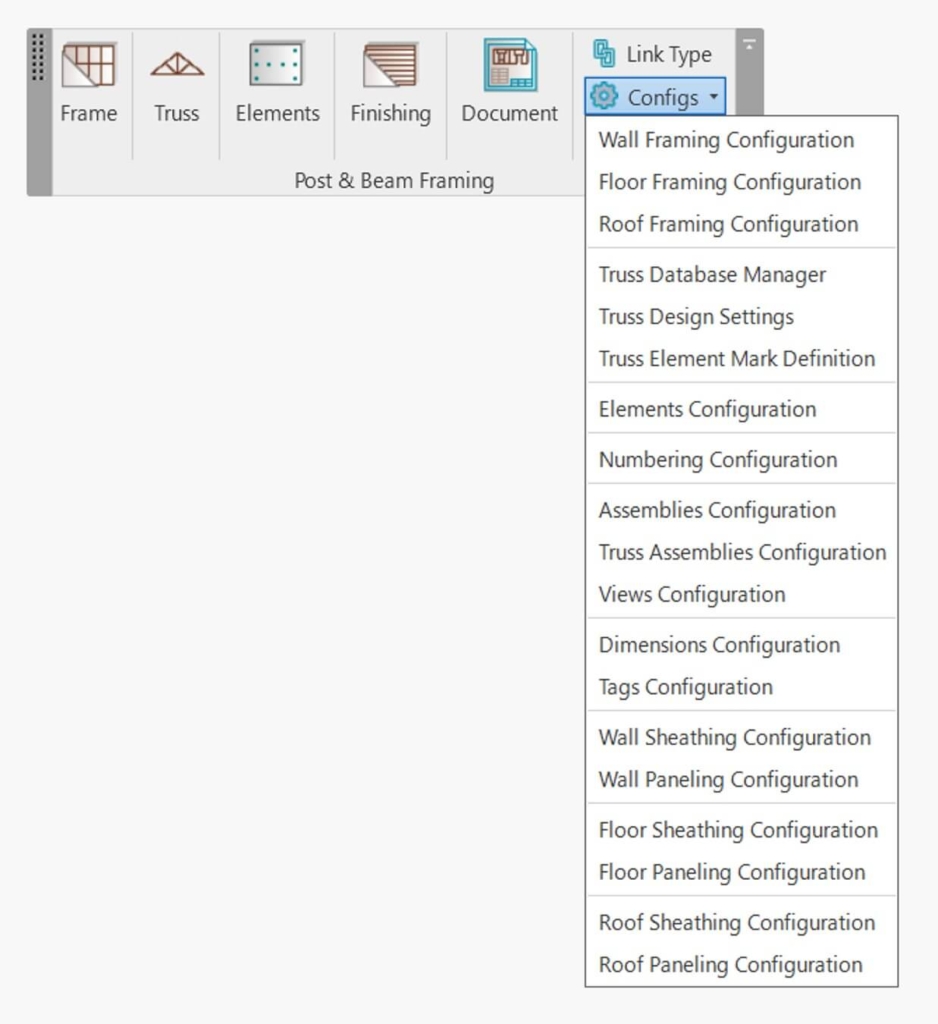
| Configs | For creating/modifying rules for modeling, numbering, dimensioning, etc. |
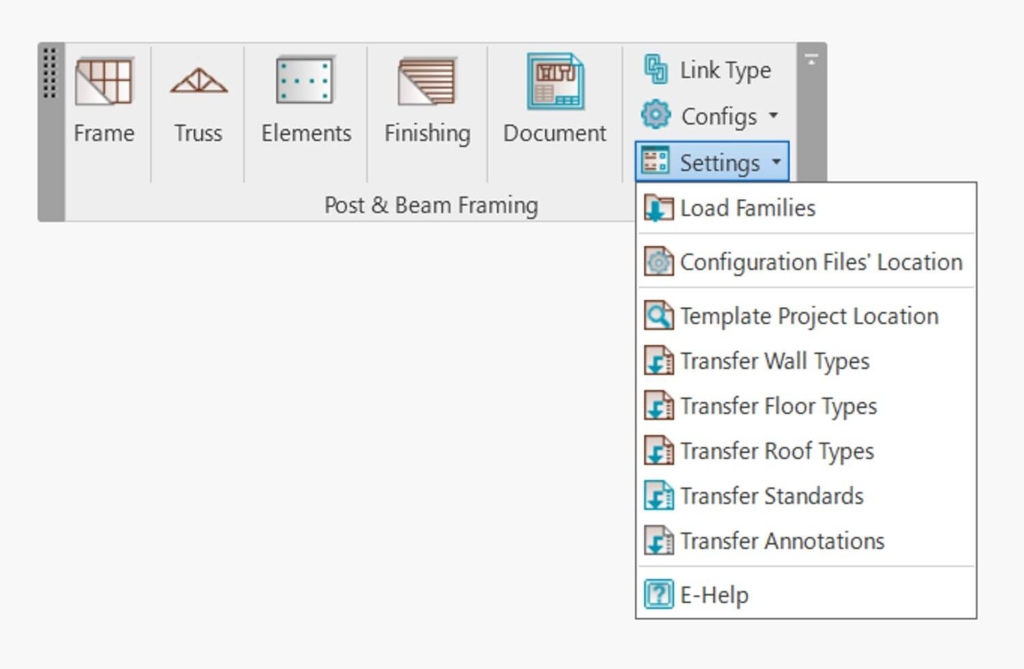
| Settings | For loading families, browsing configuration files’ locations, and transferring element types and standards. |